Step 1
First, you'll need to download the hi-res pack. Choose either the normal or master quest depending on your ROM.
THE LEGEND OF ZELDA.7z - last updated 01/12/2020
ZELDA MASTER QUEST.7z - (very old)
Notes about these texture packs
These hi-res packs are a modification of the Community v7 Pack as seen on emutalk.net. I have specifically been working with version 1.2 (U) of the ROM.
What I've done with the packs so far is
- Included Bighead's / Ronin's corrected sky textures so you don't get white boxes around the textures
- Included MikeZilla's updated interior for Link's house
- Included MikeZilla's other textures for various other things
- Fixed the missing "Ocarina of Time" portion of the logo at the start of the game when using with RiceVideo
- Made the font for "Press Start" and the name entry when you start a new game be consistent with the rest of the text in the game
- Fixed the issue with lowercase "p" being used when it should be uppercase
- Updated the texture when picking up deku stick to be consistent with the deku stick icon
- Updated missing texture for "THE LEGEND OF ZELDA#E2332BBF#0#2_all.png" in the Deku Tree
- Updated the map screen for the Deku tree to say "Inside the Deku Tree" instead of "Inside Jabu-Jabu's Belly"
- Created textures for the Deku Tree, Shooting Gallery, Bombchu Shop, Lon Lon Ranch, Hyrule Castle, Inside Hyrule Castle, and a new Hylian Crest outside the city gates.
In addition to these various fixes and additions, I've also been dumping textures that are loaded while the game is running. Dumped textures are textures that were not included in the texture pack (aka, nobody made a hi-res version of them yet). Using powershell I'm comparing the dumped texture filenames with the filenames in Federelli's Retexture Pack. By doing so, I can quickly import any textures that were already made in this other pack into the Community v7 pack. This is a fast and easy way to fill in some of the gaps in the v7 pack. Thus far I have imported an additional 109 textures into the pack.
By mixing textures in from Federelli's pack, the Save Menu texture, floor icons in the map, various item icons, and more have been fixed.
Step 2
Download and install Project64. I used version 2.3.2.202, but you can likely use the latest one available.
Step 3
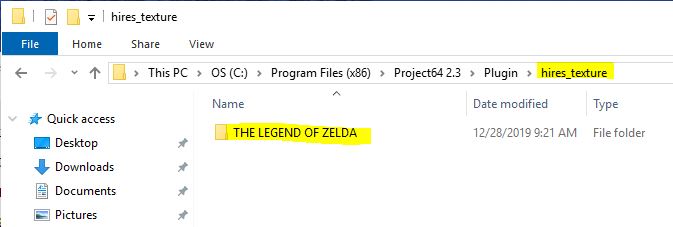
Once it's installed, browse to "C:\Program Files (x86)\Project64 2.3\Plugin" and create a new folder called "hires_texture".
Now, go inside the "hires_texture" folder and create another folder called "THE LEGEND OF ZELDA". If you are using the Master Quest ROM, you will need to name the folder "ZELDA MASTER QUEST" instead. Be sure to name it correctly, and it is case sensitive!
Step 4
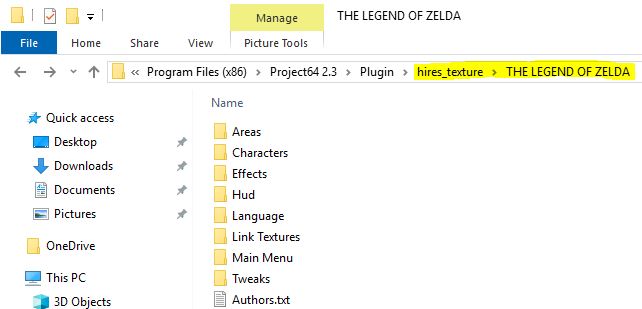
Unzip all the contents of the texture pack you downloaded into "C:\Program Files (x86)\Project64 2.3\Plugin\hires_texture\THE LEGEND OF ZELDA" (ZELDA MASTER QUEST if you are using the Master Quest ROM).
If you don't know how to unzip this type of file, download and install 7-Zip 64-bit or 7-Zip 32-bit.
Step 5
Download the RiceVideo 0.4.4 DLL and copy it into "C:\Program Files (x86)\Project64 2.3\Plugin"

Step 6
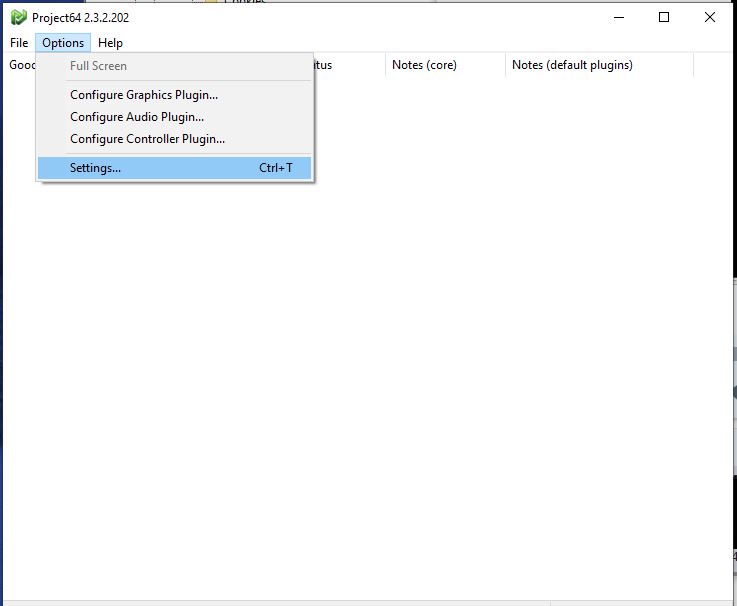
Now run Project64, and go to options > settings
In the Video (graphics) plugin, select RiceVideo 0.4.4 RELEASE. Then push OK to close this menu.

Step 7
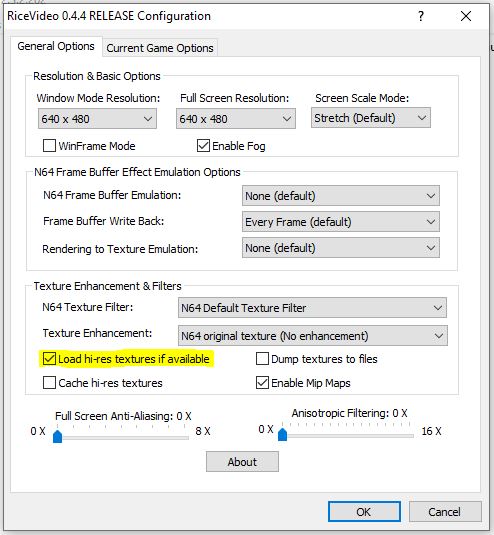
Now, go to Options > Configure Graphics Plugin

Under the General Options tab, select the "Load hi-res textures if available" checkbox.
Step 8
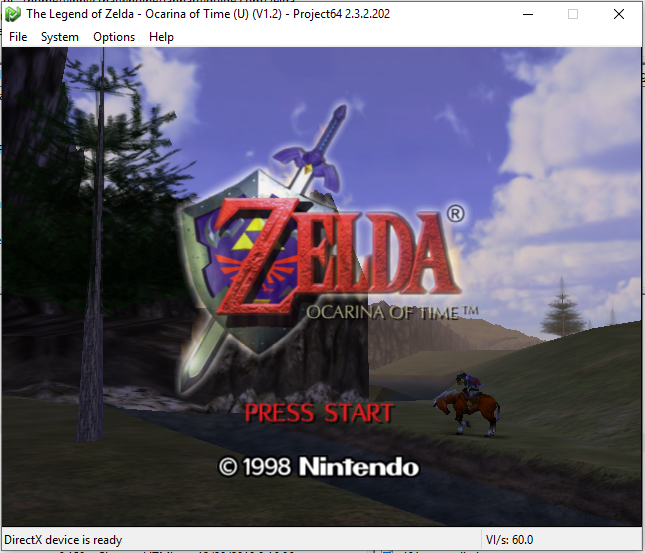
Now open your Zelda ROM by going to File > Open Rom and then browsing to it. Most Ocarina of Time ROMs will work with this pack. Also, DONT ASK ME FOR ROMS OR WHERE TO GET THEM.
While it's loading, you will see a bunch of white text on a black background. This means it is loading your hi-res textures.
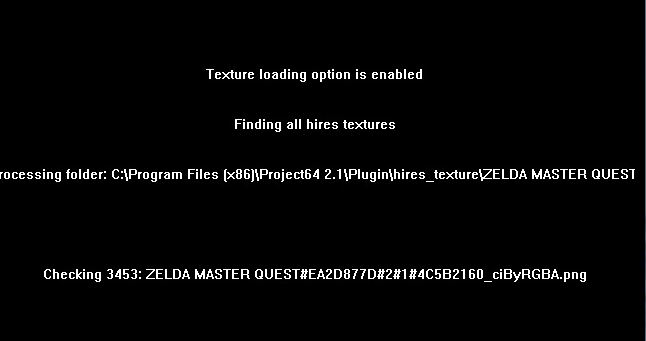
Once it's finished loading, your game should now be displaying the HiRes textures!
Other Thoughts
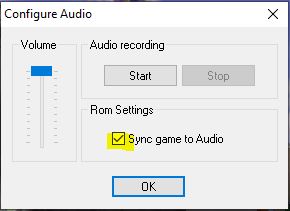
One more thing! Once it is loaded, to make sure the game runs smoothly, go to Options > Configure Audio Plugin, and make sure the "Sync game to Audio" option is selected.
And of course you can't fully enjoy the experience unless you have your N64 controller hooked up to your PC using one of these

Or if you can manage to find the legendary Adaptoid... Honestly at this point who knows if it would work with Windows 10 or newer anyway.


